Thank you for choosing HTVRONT!
Be stusepleaserea all panyingmateal carefull ensure properan effectivopeation. HTVRONT is not responsible for any loss resulting from failure to follow the instructions or from misuse due to misunderstanding.
Wal sWy iproving our products and services, and reserve the ight to update the produc, software, and Manual content without prior notice.
For the latest information and updates, please visit our official website: https://www.htvront.com/
¶ Precautions
- Ensure the power supply matches the required voltage: 120V or 220-240V;
- To prevent electric shock or other hazards, use this product only asdescribed in the manual. Do not use
it for unintended purposes; - Children under 14 years old MUST have adult supervision while usiing the product;
- Regularly inspect the power cord for any damage. If the cordd is damaged, it must be replaced by the
manufacturer or a qualified service technician; - Place the product on a flat, stable surface during use. Always keep thedevice on its base while operating;
- Do not use this product in damp or wet environments;
- To prevent accidents, do not immerse the product,power cord,orplug in water. Keep the power cord
away from the heating plate during use. Do not clean the prodluct with any liquid; - Always keep an eye on the device while it's in use to avoid accidentts;
- After use, wait until the product is completely cooled down beforechecking or storing it to avoid burns;
- When unplugging,always hold the plug itself-never pulltthe cord;
- To prevent electric shock or other hazards,always turn off the power after use or before deaning the device;
- If you notice any damage to the device or power cord, stop usingit immediately. Do not attempt to
disassemble or repair it yourself-please contact our service ceenter for assistance
¶ Specifications
| Name | HTVRONT H10 12x10in Heat Press | Model | HPS07 |
| Input Voltage | 120V ~ 60Hz 1200W220-240V ~ 50-60Hz 1100-1300W | ||
| Temperature | 100-205°/210-400°F | Time | 1-600S |
| Pressure | 4-45 kg/9-100 lb | Default Settings | 100/210°F-20S |
| ProductDimensions | 348 x 296 x 148 mm13.70 x 11.65 x 5.83 in | PackageDimension | 390 x 180 x 345 mm15.35 x 7.09 x 13.58 in |
| Product Weight | 3.7 kg/8.16 lb | Package Weight | 4.3 kg/9.48 lb |
¶ Included in the Box
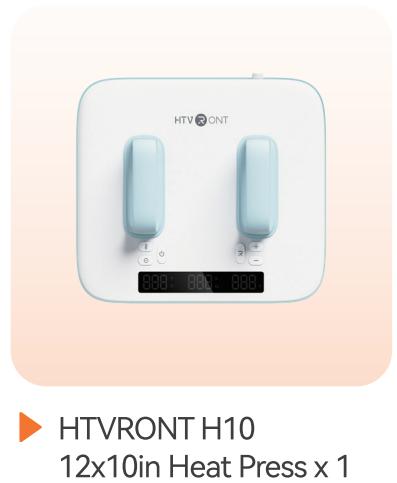
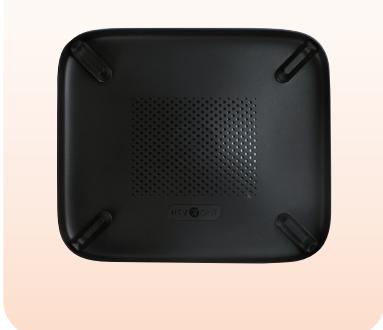
Insulated Safety Base x 1

User Guide Envelope x 1
¶ Device Overview
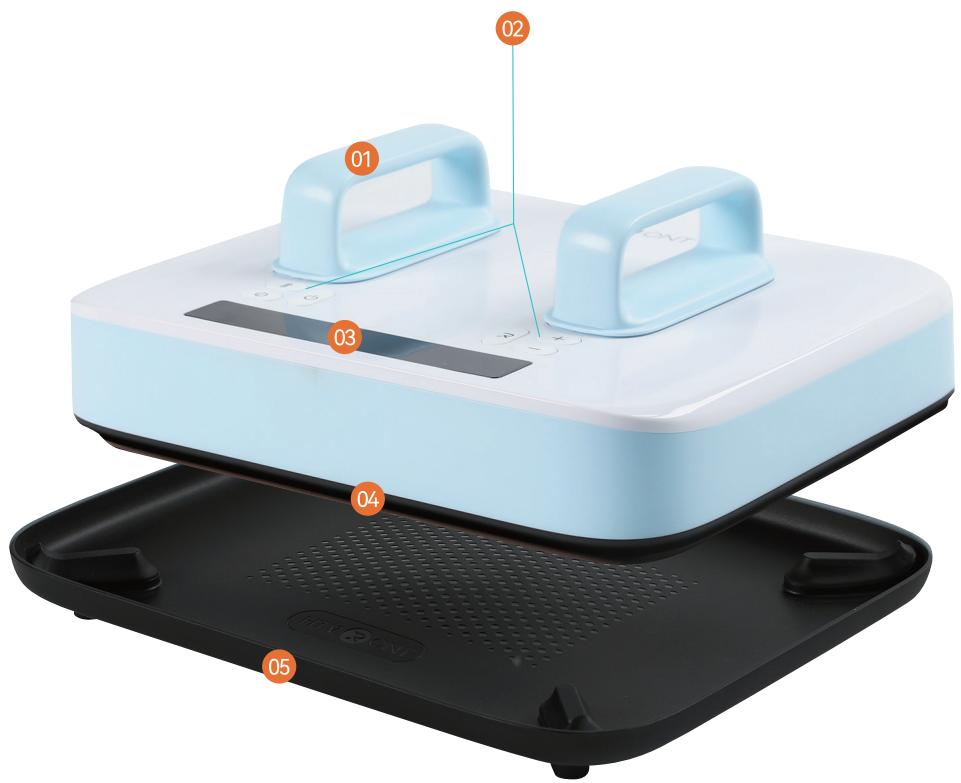
1.handke 2.Buttons 3.Display Screen 4.Heat Plate 5.Insulated Safety Base
¶ Details of Buttons
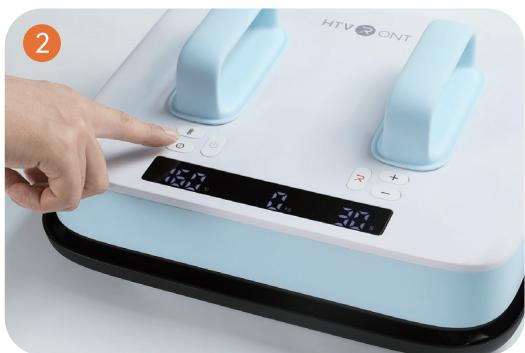
¶ Power

After powering on, the "Power" button flashes white. Press the 'Powver" button to turn on the device
¶ Temperature
o cTlash.U or button to adjust the temperature. Wait for 3 seconds to auto-exit the setting mode. Long press (≥2 s): Switch temperature units between and
¶ Time
Short press (press once): The time value flashes. Use the or button to adjust the time.
Wait for 3 seconds to auto-exit the setting mode.
Long press : Convert the pressure units .

¶ Increase

Short press (press once): Temp will increase by ; time will increase by 1 s; Long press (≥ 2 s): Increase the temperature by 10 units or time by 10 units continuously until you stop pressing.
¶ Decrease
Short press (press once): Temp will decrease by (5°F); time will decrease by 1 s; you stop pressing.
¶ Start
Press the "Start" button to iron automatically with a countdown.
¶ Functions
¶ Memory mode

The set temperature and time will be remembered for the next operation;
¶ Auto turn-off

This device will turn off automatically if there's no operation within 15 minutes after reaching the set temp. There will be beeps and flashing lights in the last 10 seconds before the shutdown;
¶ Reset pressure value

If the screen doesn't display the real-time pressure value or the value doesn't change, press the "Start" button for 3 s to back to default pressure setting.
¶ Back to the default setting (210°F/60 s/9 lb)

Press the "Power" button for 5 s to turn off the device and reset the settings.
¶ Usage Notes
1.Pre-press the fabric or substrate to smooth out wrinkles before applying the design;
2 Apply firm, even pressure until the countdown completes;
-
After restarting, the screen shows the last used settings and real-time temperature;
-
The default pressure is 9 lb/4kg. If inaccurate, press and hold thhe "Start" button for 3 secondsto reset;
-
This is a heating appliance. Please let it cool down completely before ing or cleaning to avoid burns
¶ Instructions for Use
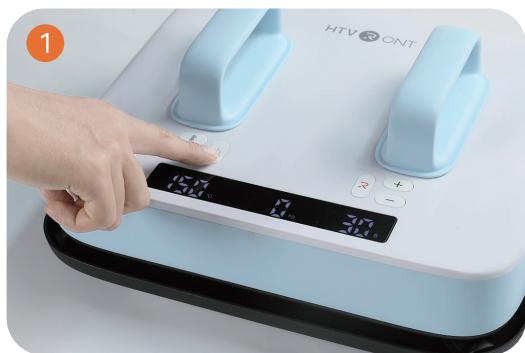
Power on the device and short press the "Power" utton to turn it on;
Set your desired temperature and time based on the Quick Reference Chart. The "Start" button lights red during preheating;
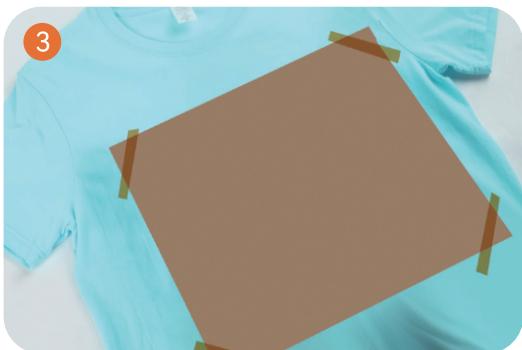
While preheating, secure the prepared design onto the substrate using heat-resistant tape (Not included), then cover the design with
a Teflon sheet (Not included);
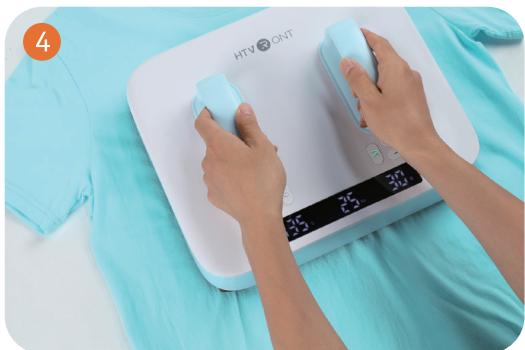
Once reaches the set temperature, the "Start" button lights green Apply pressure and start ironing
¶ Quick Reference Chart
| Material Type | Suitable Fabrics | Temp | Time | Pressure | Peel |
| Pure Heat Transfer Vinyl | 100% cotton, ≤30% cotton,polyester, modal, canvas | 145 / 295F | 15 s | 22-27 kg / 49-59 lb | Cold Peel |
| Glitter Heat Transfer Vinyl | 100% cotton, ≤30% cotton,polyester, modal, canvas | 150 /300F | 15 s | 22-27 kg / 49-59 lb | Cold Peel |
| Holographic Heat Transfer Vinyl | 100% cotton, ≤30% cotton,polyester, modal, canvas | 150 /300F | 15 s | 22-27 kg / 49-59 lb | Cold Peel |
| Chameleon Heat Transfer Vinyl | 100% cotton, ≤30% cotton,polyester, modal, canvas | 145 / 295F | 15 s | 22-27 kg / 49-59 lb | Cold Peel |
| Soft Metallic Heat Transfer Vinyl | 100% cotton, ≤30% cotton,polyester, modal, canvas | 145 / 295°F | 10 s | 22-27 kg / 49-59 lb | Cold Peel |
| GointheDarHeatansrVi | 100% cotton, ≤30% cotton,polyester, modal, canvas | 145 / 295°F | 15 s | 22-27 kg / 49-59 lb | Cold Peel |
| Reflect ive Heat Transfer Vinyl | 100% cotton, ≤30% cotton,polyester, modal, canvas | 150 /300F | 15 s | 22-27 kg / 49-59 lb | Cold Peel |
| Flock Heat Transfer Vinyl | 100% cotton, ≤30% cotton,polyester, modal, canvas | 150 / 300F | 15 s | 22-27 kg / 49-59 lb | Cold Peel |
| Puff Heat Transfer Vinyl | 100% cotton, ≤30% cotton,polyester, modal, canvas | 155 /310F | 15 s | 22-27 kg / 49-59 lb | Hot Peel |
| Patterned Heat Transfer Vinyl | 100% cotton, ≤30% cotton,polyester, modal, canvas | 145 /295°F | 15 s | 22-27 kg / 49-59 lb | Cold Peel |
| DTF Film | 100% cotton, ≤30% cotton,polyester, modal, canvas | 150 /300F | 15 s | 25-30 kg / 55-66 lb | Cold Peel |
| Dark Transfer Paper | 100% cotton, ≤30% cotton,polyester, modal, canvas | 160 /320F | 20 s | 25-30 kg / 55-66 lb | Cold Peel |
| Light Transfer Paper | 100% cotton, ≤30% cotton,polyester, modal, canvas | 160 / 320F | 20 s | 25-30 kg / 55-66 lb | Cold Peel |
| Sublimation Paper | ≤30% cotton,polyester, modal, canvas | 200 /390F | 40 s | 25-30 kg / 55-66 lb | Hot Peel |
¶ FAQS
Q1: How to achieve the best transfer results?
A1: Set the ironing temperature, time, and pressure according to the Quickeference Chart;
A2: It is recommended to use HTVRONT branded materials and follow the material guidelines strictly when usin
Q2: How to switch the temperature unit (°C/F)?
A1: Press and hold the "Temperature" button for 3 seconds to switch
Q3: How do I switch the pressure unit (kg/lb)?
A1: Press and hold the 'Time" button for 3 seconds to switch
Q4: What to do if the screen shows E01/E02/E03/E04 and thedevice beeps?
A1: Turn off the power then restart the device
A2: If the error remains, please contact customer support for assistanoce
Q5: Why does the device emit a bit of smoke during heat pressing?
A1: It is normal when using sublimation materials, as sublimation ink willprize into gas
Q6: Why can't the device be fuly turned off?
A1: It is normal for the "Power button to light up aslong as the device isowered on. If you want to turn it off just
unplug the device.
Q7:What if my device stops working?
A1: Check the power supply
A2: Try unplugging and restarting. If the issue persists,please reach out HTVRONT customer service
¶ Device Maintenance
- Before or after use, ensure the product has completely cooled down to avoid bums or short circuits;
- Always unplug and let the device cool before cleaning. Use a soft, dry dwipe the surface. Do not rinse with water
- Keep the working environment well-ventilated and dry. Avoid direct sunlight;
- After deaning, store the product in a dry,dust-free environment;
- Regularly inspect the plug and power cord for aging or damage to prevenshort circuits;
- Do not disassemble the heating components or modify the electrical circunder any circumstances
¶ HTVRONT H10 12x10in Heat Press Limited Warranty
This product is covered by a one-year warranty from the date of purchase. If a defect occurs under normal use within the
warranty period, we will provide warranty service. Proof of purchase is reuired to daim warranty service. HTVRONT accessories
are covered by a free warranty for three months from the date of purchasse. In the event that any warranty terms conflict with
applicable local laws and regulations, the local aws wil take precedence.
To the extent permitted by applicable laws, HTVRONT is not responsible for the warranty in the following situations:
malfunctions caused by improper use, maintenance, and storage byconsumers; malfunctions caused by self-repair or
dismantling by those who do not undertake the three-guarantee repairwithout the permission of our company;products
that can continue to be used after repair when the warranty expired; damage caused by force majeure. Mearwhile,
HTVRONT disclaims all implied and legal warranties, induding warranties ofmerchantability and fitness for a particular
purpose. The warranties that are allowed to be denied are for the duration of this warranty
Proof of purchase may be required to verify warranty eligibility.