Thank you for purchasing HTVRONT H17 Phone Case Heat Press. Before using this product for the first time, please read this user manual carefully and keep it properly for future reference。
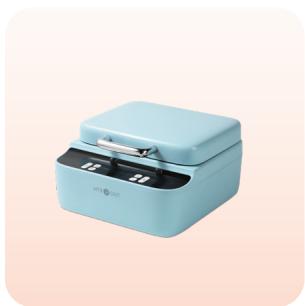
●HTVRONT H17 Phone Case Heat Press ×1
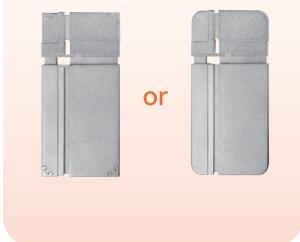
Universal Phone Case Fixture Set ×1
Sublimation Film (A4)×5

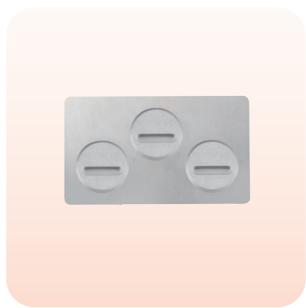
Badge Fixture Set ×1

? Heat-resistant Gloves x1 Pair

£ Heat-resistant Tape x1 Roll
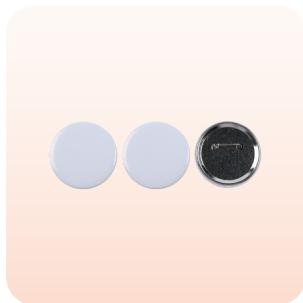
Sublimation Badge ×3

Tweezers ×1

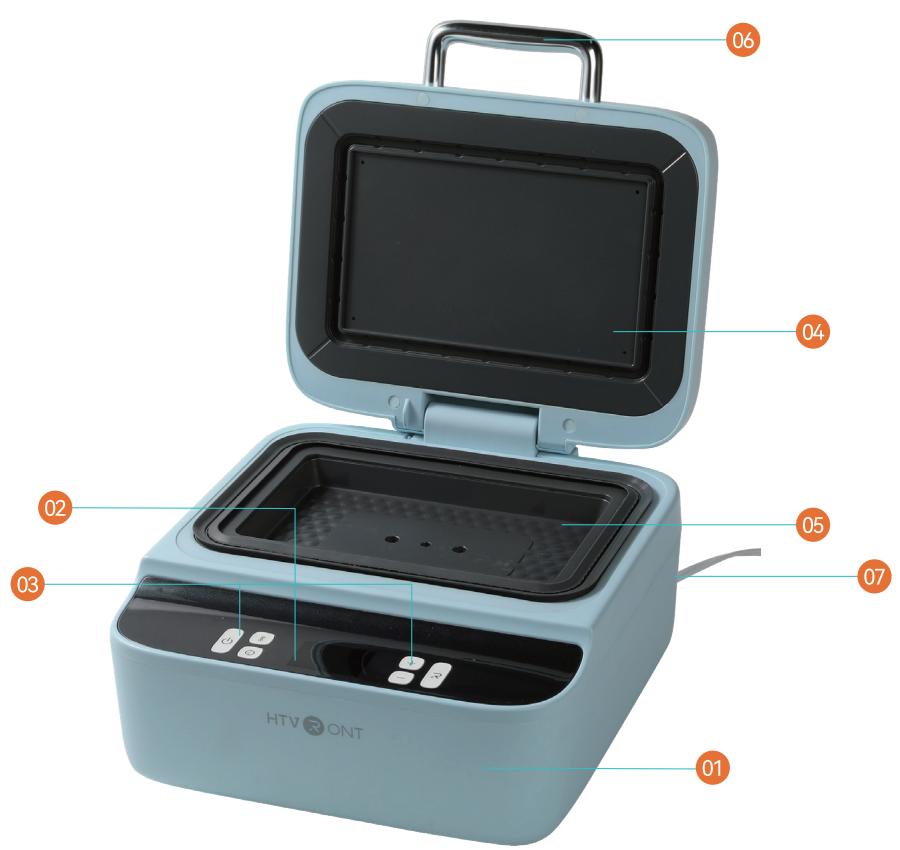
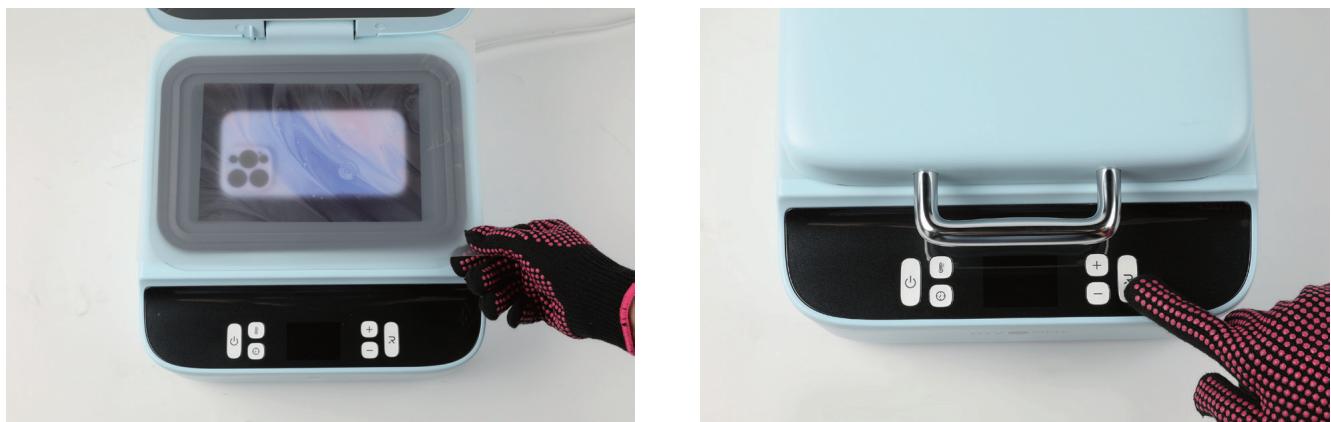
| 1、HTVRONT H17 Phone Case Heat Press | 2、Display Screen | 3、Buttons | |
| 4、Upper Heat Plate | 5、Lower Heat Plate | Handle | 7、Power Cord |

¶ Power
Power On/Off:
After connecting the powersupply,the"Power" buton flashesa white light.Ashort press willtoggle the device on or off. *To reset to factory defaults, press and hold the "Power" button for 3 seconds.
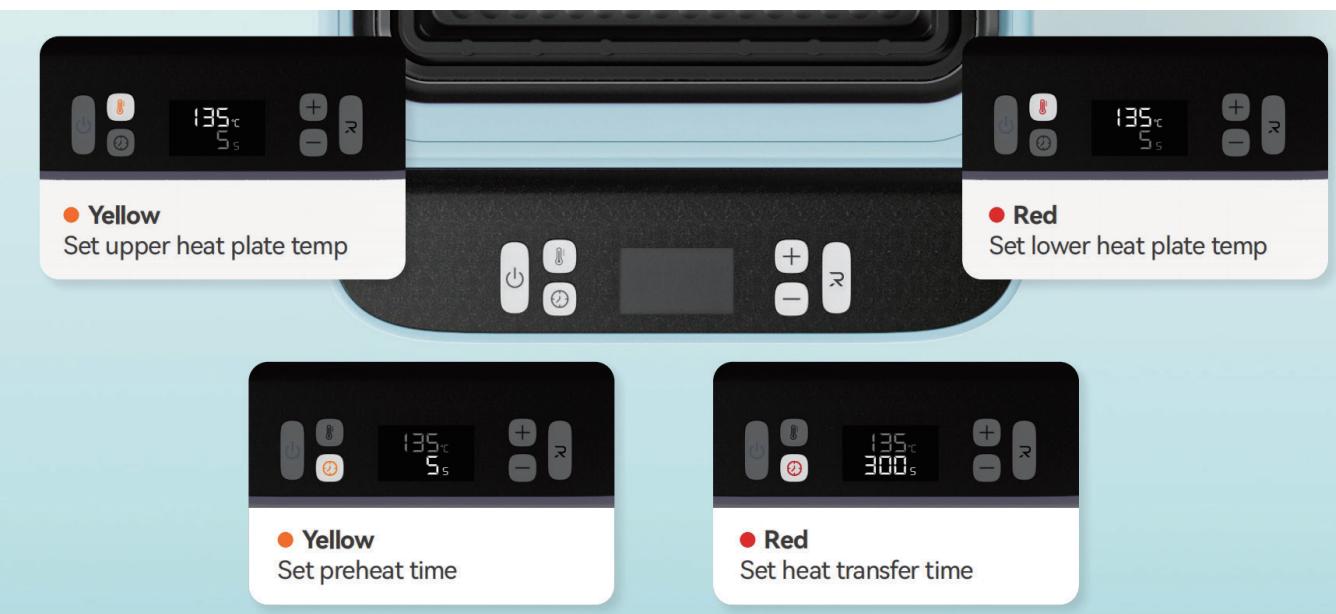
¶ Temp

Single press(Yellow light on): Adjust upper heat plate temperature;
Single press (Red light on): Adjust lower heat plate temperature.
*The indicator light will automatically turn off if no adjustment is made within 5 seconds;
Press it for 2 seconds to switch between andF.

¶ Time
Single press (Yellow light on): Set preheat time;
Single press (Red light on): Set heat transfer time.
*The light will automatically turn offif no adjustment is made within 5 seconds.

¶ Increase
A single press increases the temperature by and the time by 5 seconds; Press and hold (over 2 seconds) continuously increase the temperature by and the time by 10 seconds.
回
¶ Decrease
A single press decreases the temperature by and the time by 5 seconds; Press and hold (over 2 seconds) continuously decrease the temperature by and the time by 10 seconds.
¶ Start
Green Light: Temperature has reached the set value -activate vacuum & heat transfer;
Red Light: Temperature has not yet reached the set value.
¶ Details of Indicator Light
| Buttons | Color | Status |
| Power | Flash White | Power Connected |
| White | Powered On | |
| Temp | Flash Yellow | Upper Heat Plate Temperature Adjustable |
| Red | Lower Heat Plate Temperature Adjustable | |
| Time | Yellow | Preheat Time Adjustable |
| Red | Heat Transfer Time Adjustable | |
| Start | Flash Red | Heating or Cooling in Progress |
| Green | Target Temperature Reached | |
| Flash Green 3 s | Heat Transfer Complete |


¶ Memory mode
The set temp and time will be remembered for the next operation;
¶ Auto turn-off
¶ Restore Default Settings
The device will automatically turn off if no operation is performed within 15 minutes after reaching the set temperature. In the last 10 seconds before shutdown, a beep will sound, and the "Power" button willflash white.
Press and hold the "Power" button for 3 seconds to reset the device to the default temperature and time settings.
¶ Usage Notes
1.Wear heat-resistant gloves at all times during operation to prevent burns;
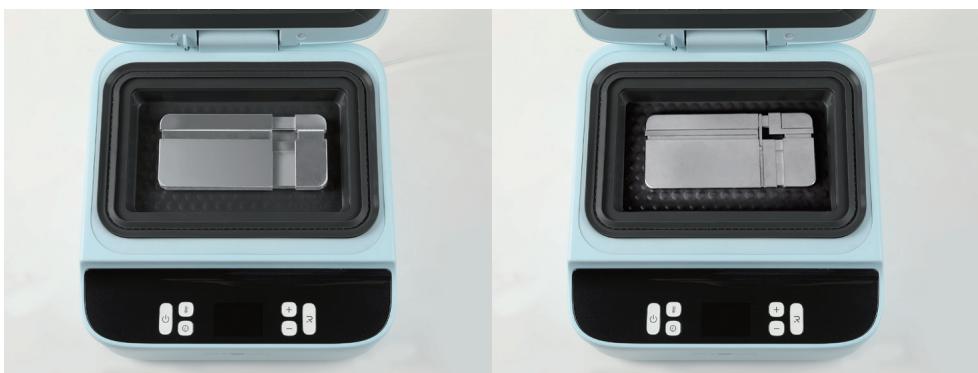
2.When heating thechamber,place thefixtureinside forpreheating.Apreheating timeofover5minutesis recommended;
3.UseonlyA4-sized sublimation film,ensuring both sidesarealignedflatinthe heating chamberforsuccesfulacuum sealing and accurate design transfer;
4.In aditionto phone cases,this device can heat press other sublimation-coated items such as badges,ceramic plates, keychains,and coasters;
5. Pressing any button during heat transfer willstop the process and return the device to standby mode;
6. Sublimation film is single-use and cannot be reused for heat transfers.
¶ Quick Reference Chart
| Substrate | Material | Tool | Upper HeatPlateTemp | Lower HeatPlateTemp | Preheat Time | Transfer Time | Peeling Method |
| Phone Case | TPU/PC | Universal phonecase fixture set | 135C/275F | 135℃/275°F | 2-10s | 300-350s | Hot Peel |
| Badge | Metal | Badge fixture set | 140C/285F | 140°℃/285°F | 2-10s | 330s | Hot Peel |
| Ceramic Plate | CeramiC | Base plate | 140°℃/285°F | 140°℃/285°F | 2-10s | 300s | Hot Peel |
| Coaster | Leather | Base plate | 135C/275F | 125℃/255°F | 2-10s | 300s | Hot Peel |
| Keychain | MDF | Base plate | 135℃/275°F | 135℃/275°F | 2-10s | 300s | Hot Peel |
| Slate Coaster | Stone | Base plate | 140C/285F | 140℃C/285F | 2-10s | 300s | Hot Peel |
| Sublimation Pen | Aluminum Alloy | Base plate | 160C/320°F | 160℃/320°F | / | 300s | Hot Peel |
| Shrink Plastic Sheet | / | Base plate | 160C/320°F | 160℃/320°F | / | 60s | / |
*Preheat the film for 5 seconds to soften it and achieve better transfer quality. *Please use the sublimation paper and the shrink plastic sheet when heat transferring the sublimation pen. *When heat-shrinking film sheets,please placea heat-resistantsilicone mat underthe base plateto prevent sticking and ensure a smoother, more even finish.
¶ Instructions for Use
I. Power on the machine, set the temperature and time,then wait for heating;
- Placethe fixturein the heating chamber and close the upper heat plate for preheating forat least 5minutes(Use support for larger phone cases;)
It is normal for the fixture to appear to have slight movement after placement
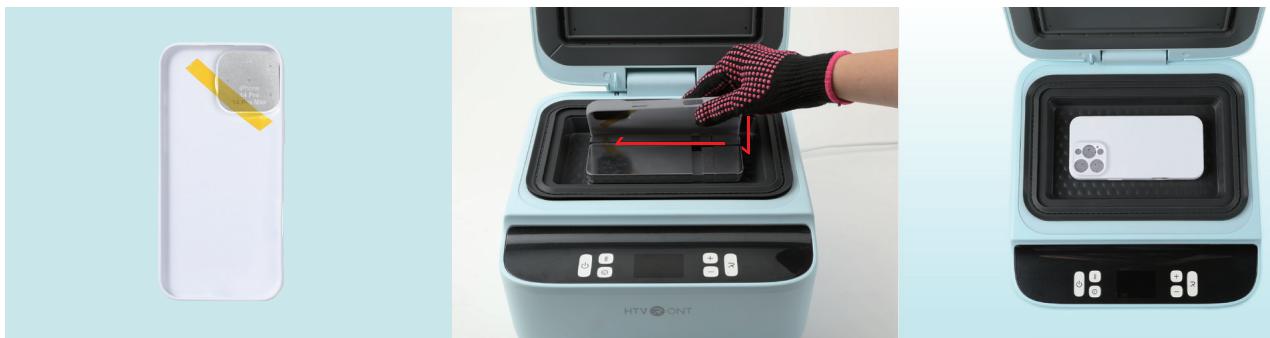
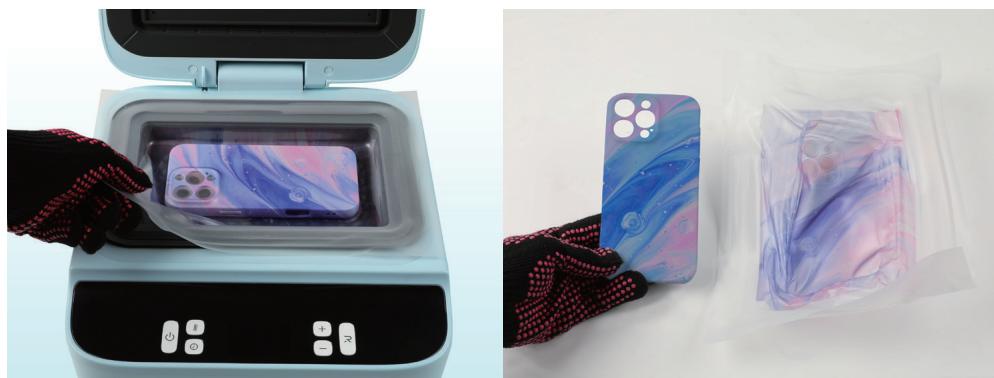
3.Stick the lenspad insidethe phone case,then mount it onto the fixture by presing firmly towards the lower-left;
*Make sure to wipe the phone case clean before ironing;
*Make sure the lens pad is used to prevent the phone case from deformation.
*When placing the lens pad,avoid covering the air holes. 4.Use asublimation printer to print the sublimation film(The matte sideis the printing surface).After the green light stays on for 10 minutes,place the sublimation film(matte side up) on the upper heat plate to dry for minutes. (The surface temperature is over )
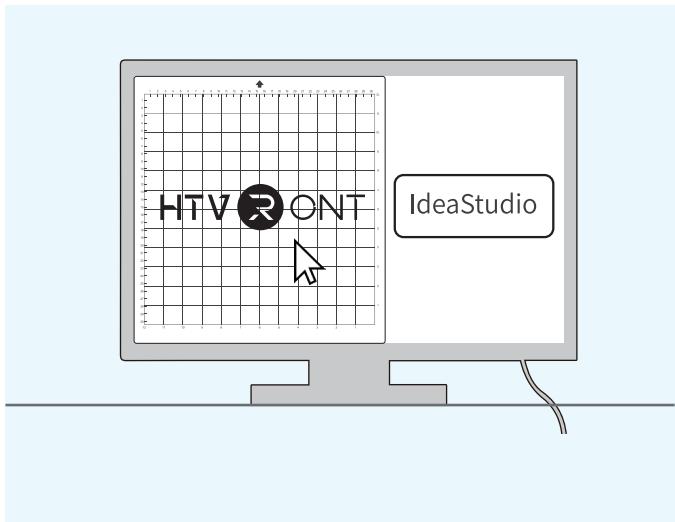
* IdeaStudio can assist with printing.

-
Lift up the upper heat plate,place the sublimation film flat with the matte side down, ensuring the film's edge fully covers the silicone,then close the plate;
-
Once the set temperature is reached,short press the Start button to begin vacuum sealing and heat transfer; not open the lid or press any buttons during the process.
*The device willbeep once the upper heat plate is lifted up or closed.
*Please place the film and close the upper heat plate within 10 seconds.
7.When heat transfer is complete, wear heat-resistant gloves to open the heat plate and peel off the sublimation film while hot. Remove the phone case from the fixture.
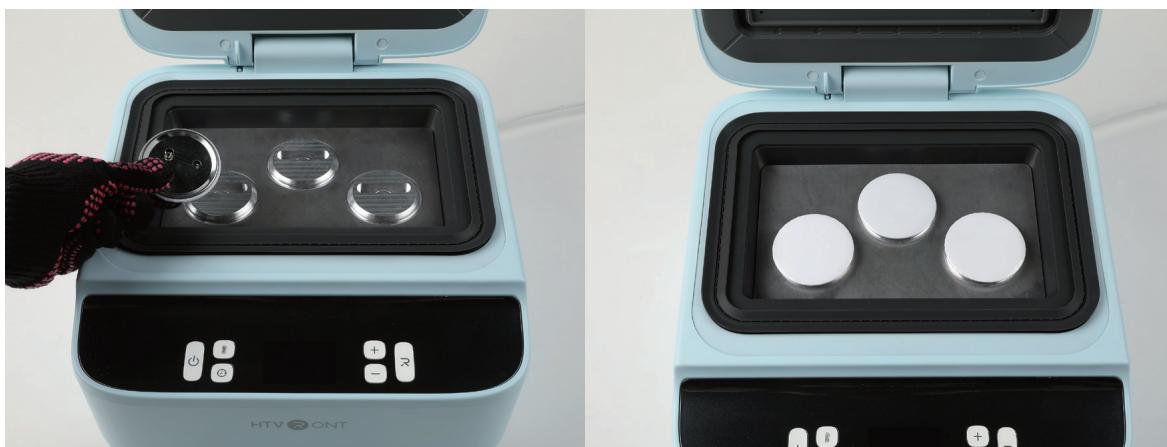
¶ [Badge Installation Instructions】
Place the badge fixture and base plate into the device as shown.Insert the badge pin into the slot and position the badge securely. IdeaStudio can assist with printing to ensure correct design placement.
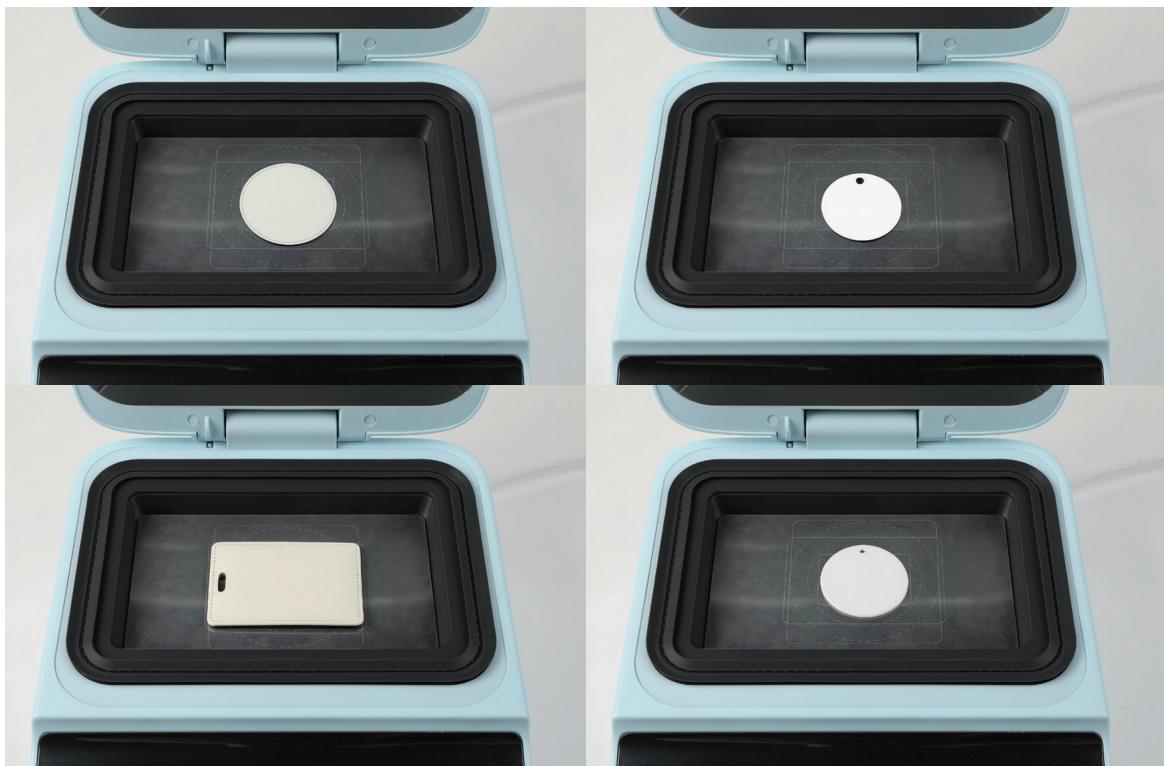
¶ [Flat Substrate Installation Instructions】
Place the base plate into the device as shown,then insert coasters,ceramic plates,or other substrates.
If pressing multiple items at once,ensure a gap of at least 1 cm between them.
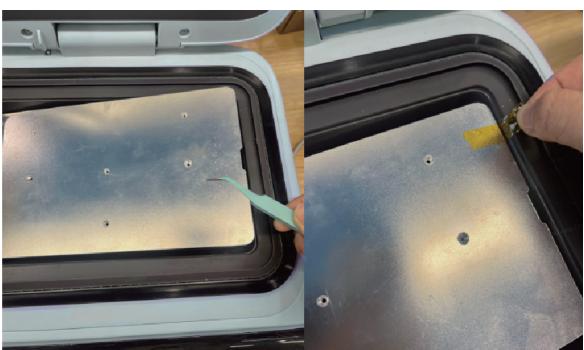
*Leather substrates may stick to the base plate after ironing. Use tweezers to lift them off, or place a sheet of plain paper underneath to prevent sticking. *Use tweezers to move the base plate, or stick some heat-resistant tape on the edge to help lift it up.
¶ 【 ldeaStudio Printing Instructions】
\textcircled{1} Download IdeaStudio from the link: https://loklik.com/download;
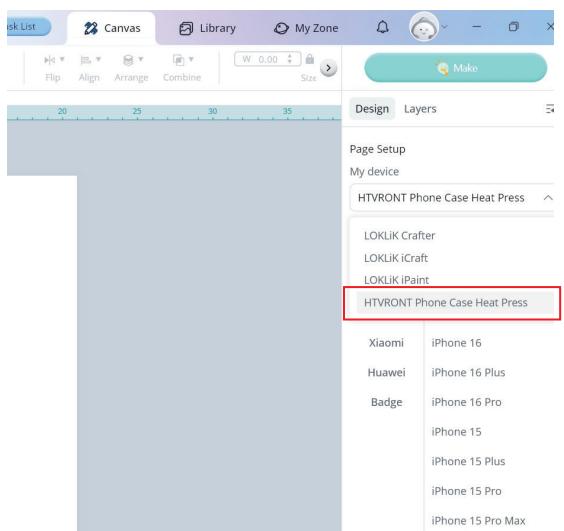
\textcircled{2} Click on Setup and select Phone Case Heat Press; *Connect your PC to the printer for printing, no need to connect the device.
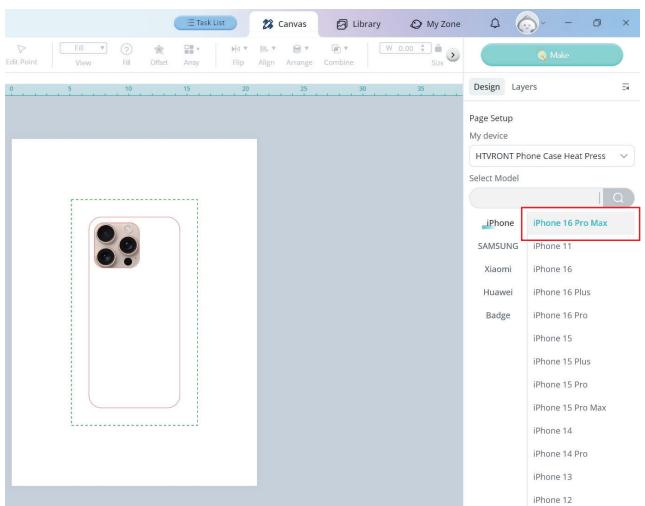
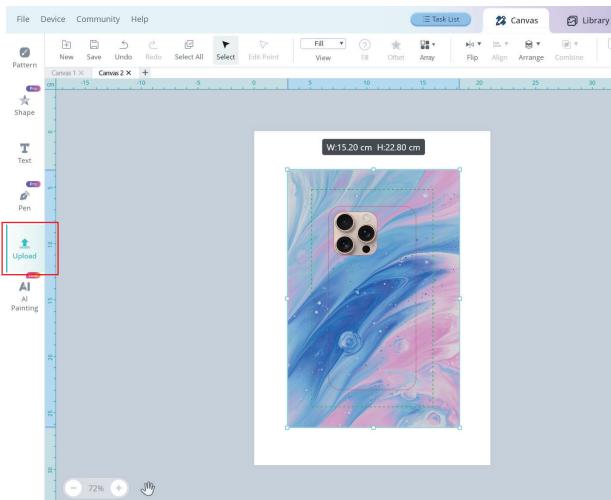
\textcircled{3} Select your phone,badge,coaster, ceramic plate, keychain, or luggage tag.If unavailable, draw the shape directly in Canvas;
\textcircled{4} Upload your image and adjust its size and position. Make sure the image fils the green frame. Ifthe design contains text,flip it horizontally before printing;
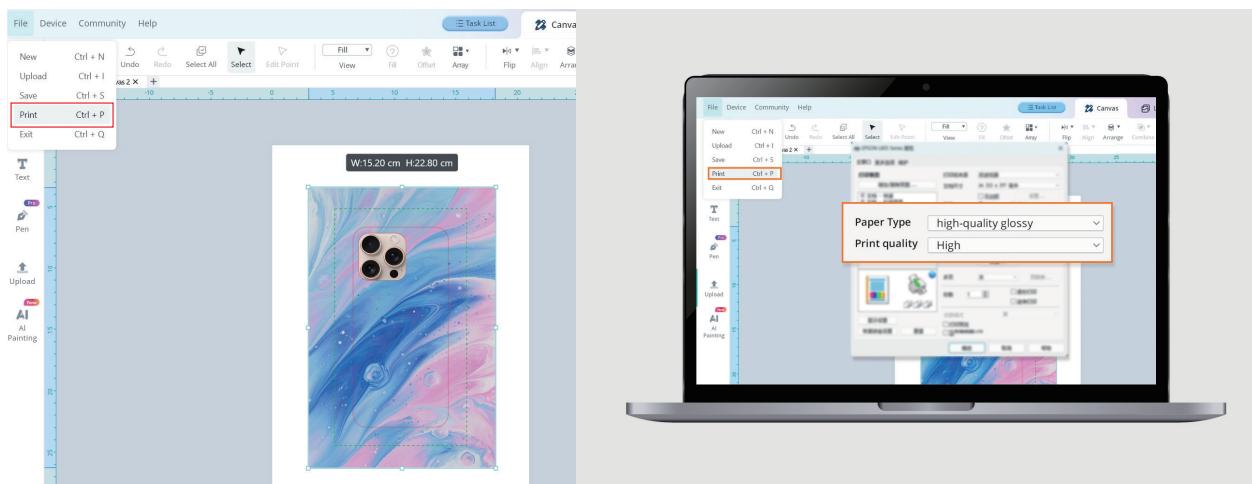
\textcircled{5} Click "Print"; for paper type,choose“High-Quality Glossy Paper”and set the quality to“High.”Ifthe printer does not offer this option,please select either“Transparency”or“Thick Paper."
| Product Name | HTVRONT H17 Phone Case Heat Press | Input | 120V~ 60Hz 1400W |
| Model | HPX01 | ||
| Temp | 100-160℃ (210-320F) | Time | 1-600 s |
| ProductDimensions | 32.6× 30.4 × 17.2 cm/12.8 x 12.0 × 6.8 inch | Machine Weight | 5.3 kg/11.7lb |
| PackageDimension | 37.5× 35.0× 22.5 cm/14.8 x 13.8 × 8.9 inch | Package Weight | 7.1 kg/15.6lb |
| 7.5 kg/16.5lb |
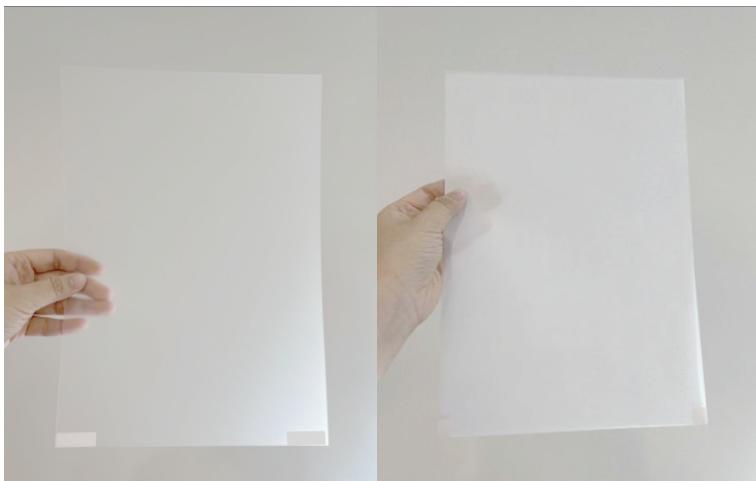
*lf paper jams or misprints occur during printing, stick a label on the bottom edge of the film.If it still fails,attach an A4 sheet to the back to improve feeding and sensor detection.
1、Do NOT use this product outdoors.It's ONLY for household use;
2、You can ONLY use this product on a flat,stable,and heat-resistant surface;
3、Keep the product away from flammables while in use;
4、When using this product,please keepan eye onito avoidaccidents.Turn offthe product and unplug the power cord while leaving;
5、Do NOT touch the heat plate after powering on to prevent burns;
6、Do NOT let the power cord touch the heat plate during the operation;
7、After use,please wait until the device is completely cool before storing it away;
8、Please unplug the power cord after use or before cleaning the productto avoid electric leaks and any risks;
9、Do NOT immerse the product in any liquid;
10、When there are beeps and on the screen, please cut the power immediately and restart. Feel free to contact HTVRONT's customer service if you have more questions;
11、If the productis malfunctioning ordamaged,please stop using the product immediately and contact HTVRONT's customer service;
12、Children under 14 MUST have adult supervision while using the machine;
13.WARNING: To reduce the risk of electric shock or injury,always unplug the product before servicing;
14.This product comes with a polarized plug (one prong is wider than the other)to reduce the risk of electric shock;
a.This plug fits only one way into a polarized outlet.
b.lf it doesn't full fit,try flipping the plug.
c.If it still doesn't fit, contact a qualified electrician.
d.Do NOT attempt to modify the plug in any way.
15. Close supervision is required when the product is used around children;
16.If the power cord is shorter than 4.5 ft(1.4 m),please follow these instructions;
a) A short cord is used to reduce the risk of tripping or entanglement.
b) You may use an extension cord,but handle it with care.
c) When using an extension cord: a.The rated power of the cord must be equal to or greater than that of the product.
bArangethecordsafelyandeatlykeeping itawafromtableedgestoavoidbeingpulled,trippedover,orgrabbedbychildren.
17. For household use only and do NOT immerse the product in water or any liquid;
18.Cleaning & Maintenance: a.Always unplug the power cord before cleaning.
b.Wait until the product is completely cool before handling.
c.Use soft,dry cloth to clean. Do not use detergents or cleaners.
d.When notin use,clean the product and store it in a cool,ventilated place,out of reach of children.
¶ Q1: What are the usage precautions for the universal phone case fixture?
A1:Thefixtureisadjustable,andusingasmallsupportofilgapscanimprove transferresults(tweezerscanbeusedforasstance); A2: Usea lens padofthe appropriate sizeand secure it with high-temperature tape for better heattransfer results; A3: For Android models,selectthe suitable R-corner from the provided setfor instalation. (No need to change the R-corner for Apple models.)
¶ Q2: How to ensure the best heat transfer results?
A1:Useasublimation printer,and ensure the printedimage'sink iscompletelydry before use.Asshown,you can place the printed image above the device'scover to speed upthe drying process or use the oven to dryit up(Recommend parameters: Temp: 40C Time: 2-3 mins );
A2: Always useA4-sizedsublimationfilm,ensuring it is alignedflat in the heating chambertoavoidvacuum sealing failure; A3: If the printed sublimation fim is notused immediately,store it ina sealedcontainer to prevent moisture absorption,which can afect the heat transfer;It is recommended to use it within 4 hours after printing;
A4: Please do use the lens pad to ensure proper support and heat transfer. Not using it may cause pressng failure or deformation around the camera area;
A5:When placing the phonecase,make sure the camera areais not aligned with the gapof the fixture to prevent the film from tearing during the vacuum process.
¶ Q3: How to remove the phone case from the fixture?
A1: Please wear heat-resistant gloves throughout the process;
A2: After the transfer is complete,open the heat plate and peel offthe sublimation film immediately;
A3: Hold the phone case and apply downward pressure to compress the fixture,then remove the phone case;
A4: If it's dificult to remove,use tweezers to grip the camera area and carefully pullout the phone case.
¶ Q4: What should be noted when heat pressing badges?
A1: Use the badge fixture and place the pin side into the slot of the fixture;
A2: Use A4-sized sublimation film;
A3: Use IldeaStudio for image printing.
¶ Q5: How to heat transfer onto coasters, ceramic plates, and other flat substrates
A1: Place the substrates on the base plate;
A2:If presing multiple items, ensure at least 1cmof space between substrates and between substrates and the heating chamber walls;
A3: Use A4-sized sublimation film.
¶ Q6: What is the unusual smell when using the machine?
A1:Thesmellis ikelyfrom the sublimationink evaporatingorthelubricantonthefixture volatilizing.This isanormal occurrence.
¶ Q7: What to do if the printing fails?
A1: Please use a sublimation printer and ensure it supports media thicker than ; A2: Set the print size to A4.It is recommend to select“Transparency”or“Thick Paper”as the paper type; A3:The film may afect sensor detection or cause feeding issues due to its transparency or smooth back.Attach a sticker to the edge or an A4 sheet to the back to mprove performance.
¶ Q8: How should I store the product after use?
A1: Please store the device after it is completely cool;
A2: If there is any sublimation ink residue on the flat base,clean it with alcohol
¶ 9: Why is there a color diference between the original image and the transferred design
A1:This maybedue toyour printer modelorthetypeofinkused.Tryperformingcolorcorrectionandcleaning the printhead;
A2: If the final result looks too yellow, reduce the yellow ink output in the printer settings;
A3: Glossy phone cases tend to produce more vibrant results than mate ones一choose the type that suits your preference;
A4: Make sure to follow the recommended heat pressing settings. Over-pressing may also afect color accuracy.
¶ Q10: How to achieve the best vacuum transfer results?
A1: Do not block the air holes on the lens pad when sticking it to the phone case;
A2: Ensure the sublimation film covers the silicone ring fully when placing it for the best result;
A3: Set the preheating time within the recommended range of 0-10 seconds (Optimal: 5 s);
A4: Please place the film and close the upper heat plate within 10 seconds;
A5: Press the inner and outer silicone ring gently to ensure proper airtightness while the machine is cool.
¶ Q11: What to do if the screen shows E1/E2/E3?
A1: E1- Heating failure;
A2: E2 - Temperature rise error;
A3:E3- Short circuit or open circuit error;
A4: If any of the above occur,please turn off the power immediately and stop using the machine. Contact HTVRONT customer service for assistance.
¶ HTVRONT H17 Phone Case Heat Press Limited Warranty
This product is covered byaone-year warrntyfromthe date of purchase.Ifa defect occurs under normaluse within the warrantyperiod,wewillprovide warantyservice.Proofofpurchase is requiredtoclaimwarrntyservice.HTVRONTaccessories are covered bya free waranty for three monthsfrom the date of purchase.In the event that any warranty terms conflict with applicable local laws and regulations, the local laws willtake precedence.
To the extent permitted byaplicable laws,HTVRONT isnot responsible for the warranty in the following situations: malfunctions caused byimproper use,maintenance,and storage by consumers; malfunctions caused by self-repair or dismantling bythosewhodo not undertake thethree-guarantee repair without the permision ofour company; products that cancontinue to be used after repair when the warrnty expired; damage caused by force majeure.Meanwhile, HTVRONTdisclaims allimpliedand legal warranties,induding warantiesof merchantabilityandfitness foraparticular purpose.The warranties that are allowed to be denied are for the duration of this warranty.
Proof of purchase may be required to verify warranty eligibility.