Thank you for choosing HTVRONT!
Bee st use, please rea all panygmateals careful oensure properand effctvepeation. HTVRONT is not nsibleor ny los resulti om filur olow thestin om ise to misunderstanding.
Wl sW improving our products and services, and reserve the right to update the product, software, and Manual content without prior notice.
or the latest information and updates, please visit our official website: https://www.htvront.com/
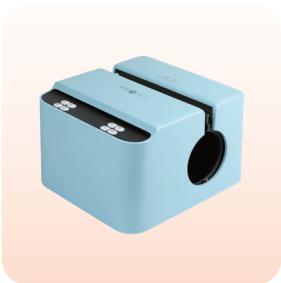
¶ Device Overview
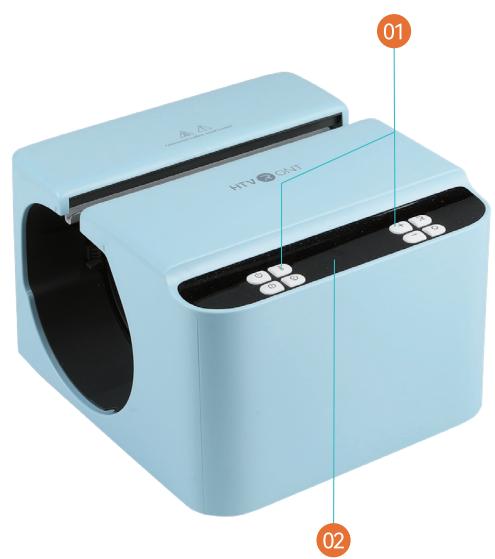
¶ Buttons
- Display Screen
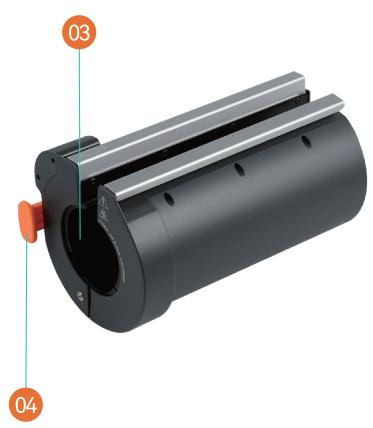
- Heat Plate Handle
Time: 1~199s
Temp: 100 ~ 200°C (210 ~ 390°F)
Pressure: 20 ~ 70 kg (45 ~ 155 lb) - Heat Plate
¶ Included in the Box
¶ Included in the Box - Tumbler
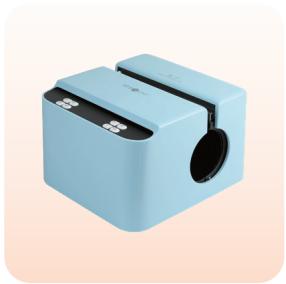
HTVRONT A200 Auto Tumbler Heat Press x 1
2 mm Tumbler Heat Press Mat x1

4 mm Tumbler Heat Press Mat x 1
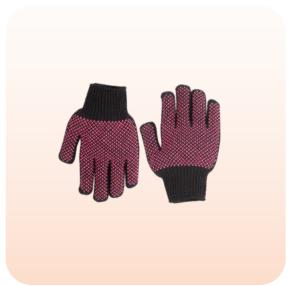
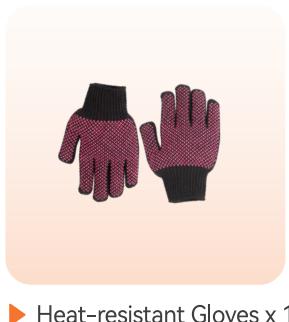
Heat-resistant Gloves x 1

Heat-resistant Tape x 1

User Guide Envelope x 1
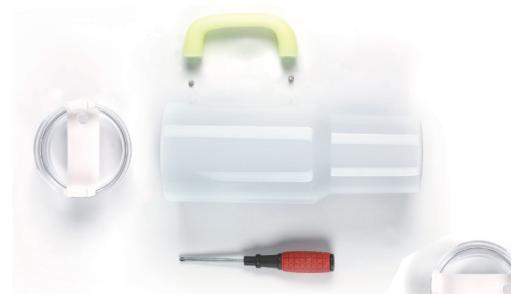
¶ Included in the Box - Tumbler with Handle
HTVRONT A200H Auto Handle Tumbler Heat Press x 1

2 mm Handle Tumbler Heat Press Mat x 1

Heat-resistant Tape x 1 Roll

User Guide Envelope x 1
¶ Details of Buttons
¶ Power
After powering on, the "Power" button flashes white. Press the 'Povver" button to turn on the device

¶ Temperature
Short press (press once):The temperature value flashes. Adjust the tempeature immediately with
the"+" or"-"button and wait for 3 s to exit the settings;
Long press (2 s): Convert the temp units (°C/F).

¶ Time
Press "Time" and the time value flashes. Adjust the time immediately with the or "-" button and""utton and wait to exit the settings.

¶ Pressure
Short press (press once): The pressure value flashes. Adjust the pressure mediately with the
+" or "-" button and wait for 3 s to exit the settings;
Long press (2 s): Convert the pressure units (kg/lb).

¶ Increase
Short press (press once): Temp will increase by 5°C (5'F);time will increaby 5 s; pressure
will increase by 5 kg(5 lb);
Long press (≥ 2 s): Increase the temperature by 10 units, time by 10 units
10 kg(10|b) continuously unti you stop pressing.

¶ Decrease
Short press (press once): Temp will decrease by 5°C (5F); time will decrea5 s;pressure will
decrease by 5 kg(5 lb);
Long press (≥2 s): Decrease the temperature by 10 units, time by 10 units,by 10 kg(10 lb)
continuously until you stop pressing

¶ Custom
Press the "Custom"button to customize the ironing modes (A/B/C/D). Select me mode, and the
selected mode icon will light up on the digital screen accordingly. Pressthe "Temp", "Time" or
"Pressure" buttons and adjust the settings with the "+* or "-" button andwait for 3 s to exit
settings
¶ Start
Press the "Start" button to iron automatically with a countdown. The "Start" button flashes red when preheating, then turns green once it reaches the set temperature. The "Start" button flashes green when the device is cooling (The set temp is lower than the real-time temp).
| Mode A | Mode B | Mode C | |
| Applicable Tumblers | 20 oz Stainless Steel Tumbler | 30 oz Stainless Steel Tumbler | 16 oz Glass |
| Time | 195 s | 185 s | 300 s |
| Temp | 200/390F | 200/390F | 200/390F |
| Pressure | 45 kg/100 lb | 45 kg/100 lb | 45 kg/100 lb |
| Mode D |
| 40 oz Tumbler with Handle |
| 170 s |
| 200C/390F |
| 45 kg/100 lb |
¶ Functions
¶ Memory mode
The set temperature and time will be remembered for the next operation;

¶ Auto turn-off

This device will turn off automatically if there's no operation within 15 minutes after reaching the set temp. There will be beeps and flashing lights in the last 10 seconds before the shutdown
Short press (press once): Temp wil increase by ; time will increase by 5s; pre will increase by ;
¶ Emergency stop
Press any button when the heat plate is closing, and the heat plate will reset to its original position;
¶ Back to the default
setting (210°F/60 s/25 Ib)
Press the "Power" button for
5stoturnoff the device and
reset the settings

¶ Usage Notes
- Please ensure the tumbler has a sublimation coating:
- For 40 oz tumblers with handles, please remove the handle with a screwdriver first
- Please ensure the tumbler is dean without any liquid, or duston the surface;
- Do not put the tumbler into the heat plate while preheating:
- Please remove the lid andle (if any)before putting the tumbler into tthe heat plate;
- Please use the appropriate size heat press mat to wrap the tumbler. Forletails, refer to the Quick Reference Chart;
- Please be sure to put the tumbler in the center of the heat pressmat, cover the tumbler fully, and put it into the heat
plate with the open end facing up; - Please wear heat-resistant gloves when putting in or taking out the tumler to avoid burns;
- Please note that if the tumbler fails to satisfy the recommended ocapacity, diameter, and length range requirements at
the same time,it may affect the ironing effect (please refer to the producton table below for specific application range): - Please remove the tumbler and the heat press mat after ironing: do not leave it inside the device.
¶ Device Maintenance
- Before or after use, ensure the product has completely cooled down to avoid bums or short circuits;
- Always unplug and let the device cool before deaning. Use a soft, drydoth to wipe the surface. Do not rinse with water,
- Keep the working environment well-ventilated and dry. Avoid directsunlight;
- After deaning, store the product in a dry,dust-free environment;
- Regularly inspect the plug and power cord for aging or damage to prevenhort circuits
- Do not modify the electrical circuit under any circumstances
¶ Instructions for Use
Power on the device; short press the "Power" button to turn it on (Default settings: 100/210°F, 60 s, 25 lb); after setting the appropriate temp and time, the device starts preheating. During preheating, the Start"button lights up in red;

Put the sublimation paper in the sublimation printer with its rough surfacte upward, print the image out and dry it
cut the image out to fit the tumbler size,clean and wipe the tumbler, andattach the image tightly to the tumbler
with heat-resistant tape;
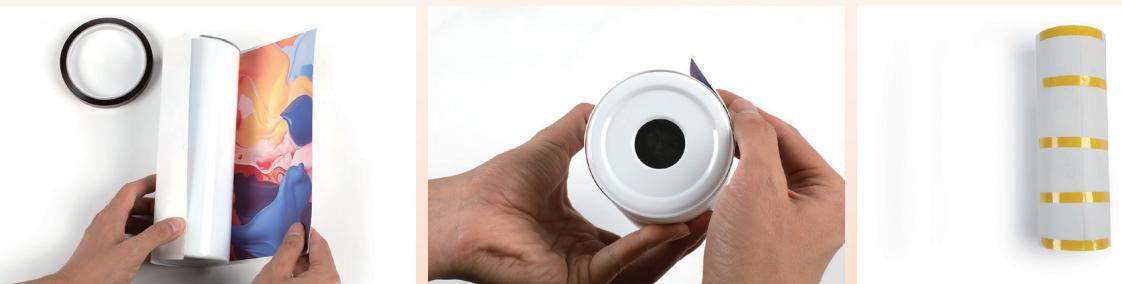
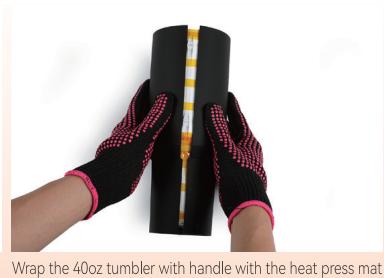
Wrap the tumbler with the heat press mat (please refer to the Quick Reference Chart below for the corresponding heat press mat specific to tumblers), please keep both ends aligned;

Once the "Start" button turns green, wear heat-resistant gloves and place into the heat plate
from the right opening, with the open end facing up and centered. Ensuretthe heat press mat is not displaced
or offset

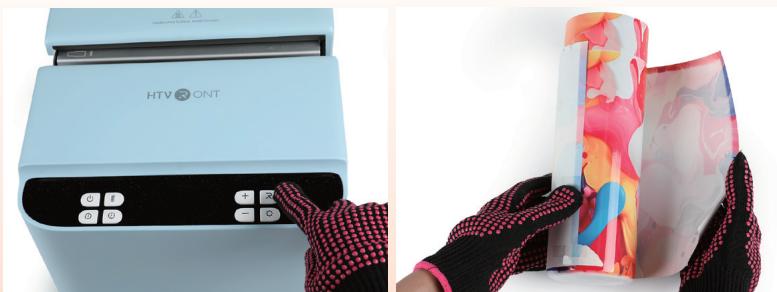
Press the "Start" button to start automatic ironing. The heat plate will release when the countdown ends and the device emits a long beep. Take the tumbler and heat press mat out. Wait for 30 s and tear off the sublimation paper. Do not rinse it with cold water immediately to avoid bursting.
¶ Quick Reference Chart
| Tumbler type | Optimal Tumbler Diameter | Time | Temperature | Pressure | Heat Press Mat |
| z stainless seel tumbler | 7.5 cm/2.95 in | 190 ~220 s | 200/390°F | 40~60 kg/90-135 lb | mmtumbler heat press mat |
| 30oz stainless steel tumbler | 8 cm/3.15 in | 180~210 s | 200/390°F | 40~60 kg/90-135 lb | 2.0 mm tumbler heat press mat |
| 40 oz tumbler with handle | Top-end Outer Diameter: 100mm/3.9 Bottom Outer Diameter:74 mm/2.9 | 160~190 s | 200°/390°F | 40~60 kg/90-135 lb | 2.0 mm handle tumbler heat press mat |
| 16 oz glass tumbler | 7.5 cm/2.95 in | 290~320 s | 200/390°F | 40~60 kg/90-135 lb | 40mm tumbler heat press mat |
| 1 z stainless seel tumbler | 7.5 cm/2.95 in | 190~220 s | 200C/390°F | 40~60 kg/90-135 lb | 4.0 mm tumbler heat press mat |
¶ Operation Guide for Tumbler with Handle
¶ Step 1
Before ironing the 40oz tumbler with handle, please remove the handle with a screwdriver first;
¶ Step2
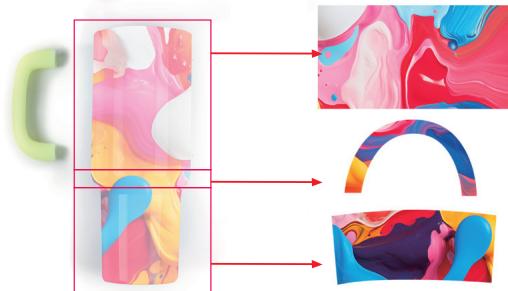
Put the sublimation paper in the sublimation printer with its rough surface upward, print the image out, dry it, and cut it out to fit the tumbler size. If you need to transfer the image to cover the tumbler fully, prepare 3 sections of sublimation paper (upper, middle, and lower sections);
¶ Step 3
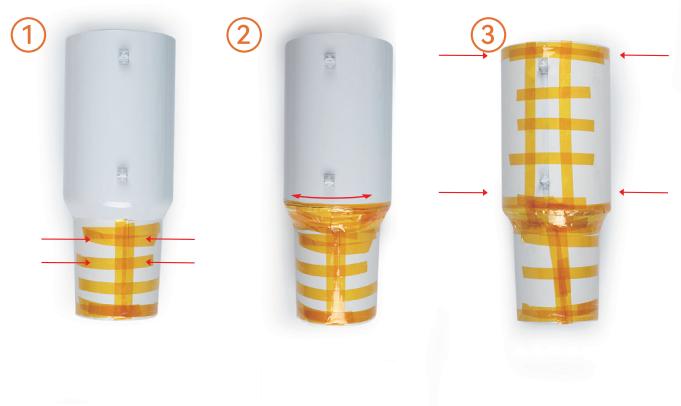
Clean and wipe the tumbler, and attach the design tightly to the tumbler with heat-resistant tape. It is recommended that the image be stuck in the order of lower, middle, and upper sections.
¶ Replacement Guide for Heat Plate
¶ Precautions:
- Please replace the heat plate when it is completely cool;
- If you replace the hot heat plate, please wear heat-resistant gloves.
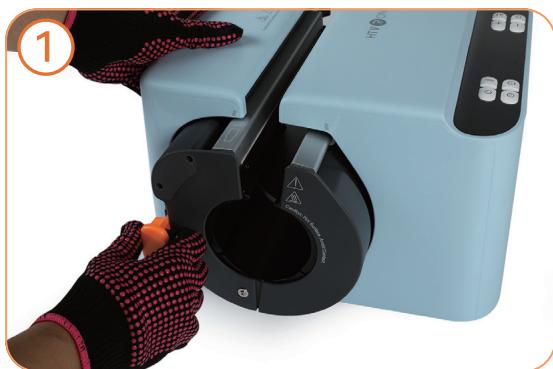
Grip the orange part of the heat plate module and pull it out;
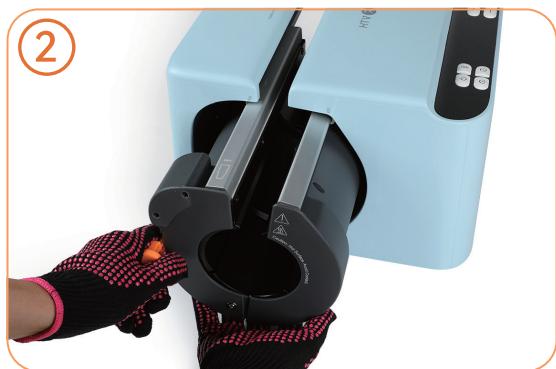
Support the heat plate with one hand while pulling;
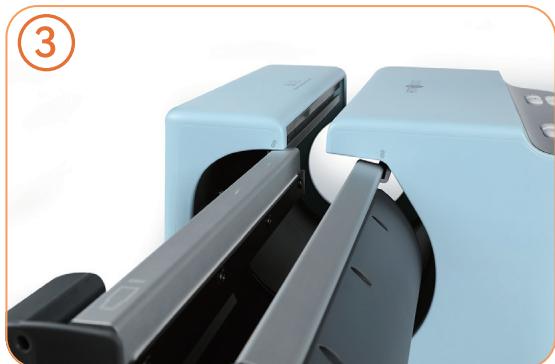
Align the two slide rails on the heat plate module with the slide rail markings on both sides of the device and slide it in;
Push the heat plate until a "Click" is heard.
¶ Templates Printing Instructions
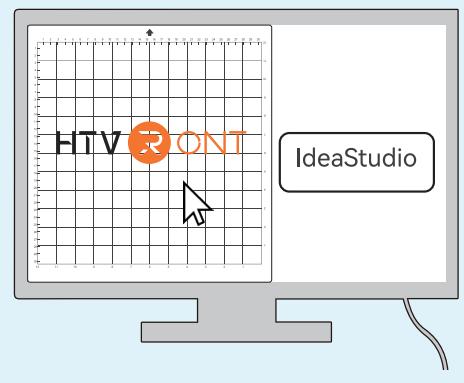
¶ Step1
Download IdeaStudio:
https://store.loklik.com/download:
¶ Step2
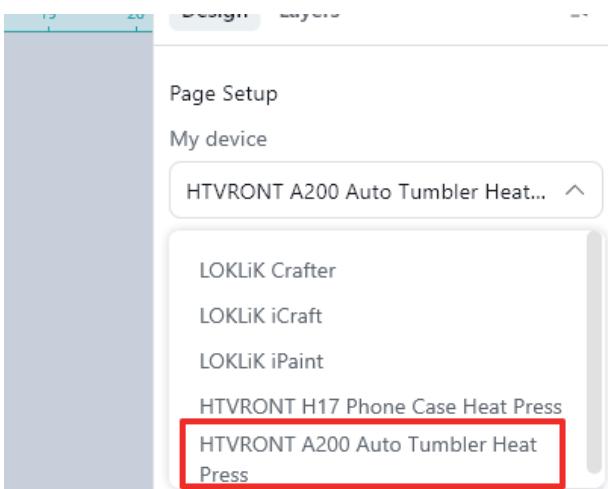
Select HTVRONT A200 Auto Tumbler Heat Press in the software;
¶ Step 3
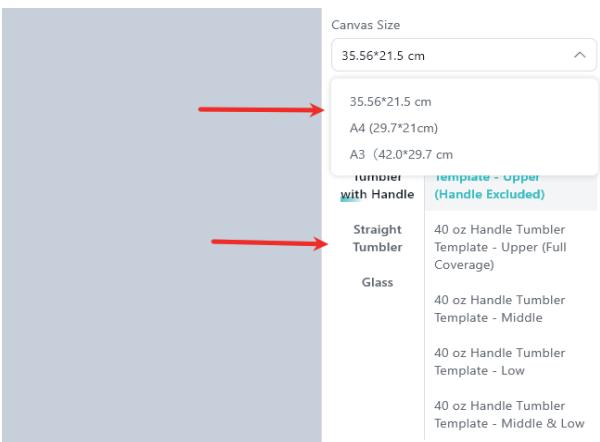
Select the canvas size (Recommended size: in) and the templates.
The 40-oz tumbler template has been divided into three sections:
- Upper - Handle Excluded and Upper - Full Coverage
- Middle
- Low
Note: When printing the upper section, it is recommended to use the "Upper - Handle Excluded" for better transfer result.
¶ Step4
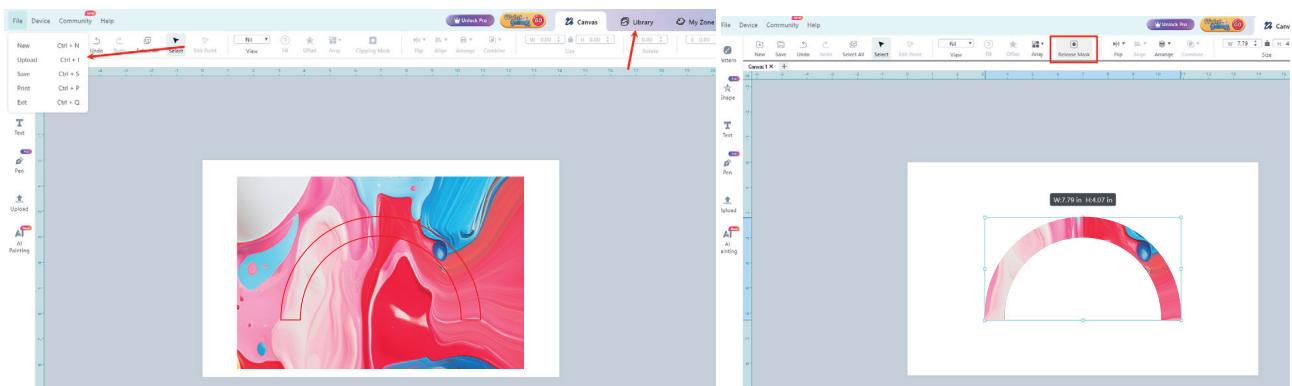
Upload your image or select your design in the IdeaStudio's "Library"; CliMask to trim the design
and mirror the design;
¶ Step 5
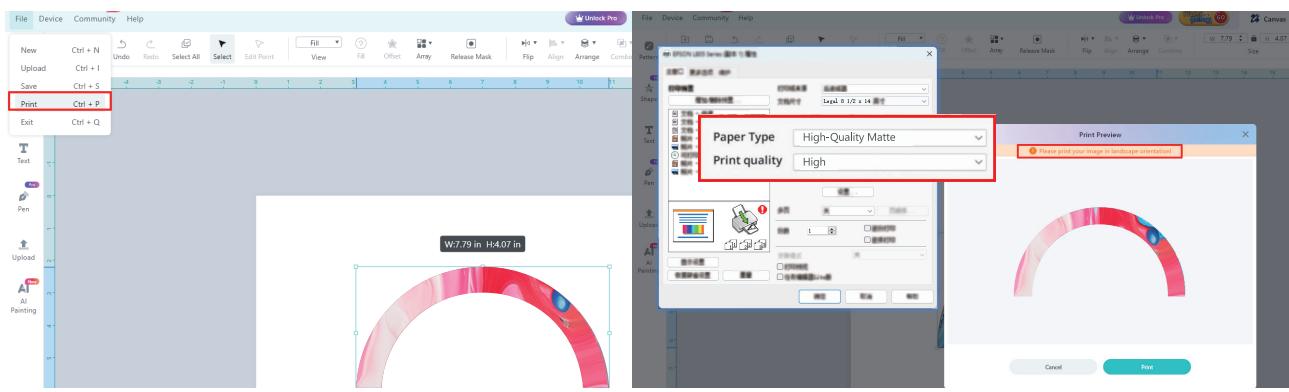
Print the templates out with the sublimation printer and the sublimation paper. Reende printig settings: rint Quality High; OrintationLandscape;aperType:High-Qualityatte
¶ FAQS
¶ Q1: How to achieve the best heat transfer result?
e ey — facing up; Arecngsirdoard the evdrheat presg.
¶ Q2: Why does the device emit slight smoke during or after ironing?
A1: It is normal as sublimation ink will sublimate into gas at high temperatures and produce odor.
Q3: What to do if the display doesn't show parameters after replacing the heat plate?
ier Reisr it and push ly nto pe.
¶ Q4: What to do if the device beeps and shows an "E1/2/3/4/5/6" error on the screen?
on again;
A2: Try replacing it with a new heat plate module;
AContact the HTVRONT customer support for further assistance.
¶ Specificationgs
| Product Name | HTVRONT A200 Auto Tumbler Heat Press | HTVRONT A200H Auto Handle Tumbler Heat Press |
| Model | HPT02 | HPT02 |
| Color | Bubble Blue, Daisy White | Bubble Blue, Daisy White |
| Input Voltage | 120 ~ 60 Hz220 - 240V~50/60 Hz | 120 ~ 60 Hz220 - 240V ~ 50/60 Hz |
| Power | 1200 W 1098~1306 W | 1200 W 1098~1306 W |
| Temp Range | 100-200C/210F-390F | 100-200°C/210°F-390F |
| Time Range | 1-999 S | 1-999 S |
| Pressure Range | 20-70kg/45-155lb | 20-70kg/45-155lb |
| Heat Plate Length | 280 mm | 280 mm |
| Tumbler Diameter | Outer Diameter 74-80 mm | Top Outer Diameter: 100 mmBottom Outer Diameter: 74 mm |
| Heat Transfer Length | 260 mm | 260 mm |
| Wire Length | 1.6 m | 1.6 m |
| Connection | Y Connection | Y Connection |
| Product Dimension | 335 x 310 x 226 mm/13.2 x 12.2 x 8.9 in | 335 x 310 x 226 mm |
| Package Dimension | 390 x 355 x 280 mm/15.4 x 13.2 x 11 in | 390 x 355 x 280 mm |
| Product Weight | 8.3 kg | 8 kg |
| Package Weight | 9.4 kg | 9 kg |
¶ Precautions
- Ensure the power supply matches the required voltage: 120Vor 220240V
2 To prevent electric shockor other hazards, use this product only as descthe manual. Do not use it for unintended purposes - Children under 14 years old MUST have adult supervision while using theduct
- Do not use this product outdoors. It's only for household use:
- Regularly inspect the power cord for any damage. If the cord is damagedmust be replaced by the manufacturer or
a qualified service technician; - Do not touch the heat plate by hand directly to avoid burns
- Always wear heat-resistant gloves during heat transfer. Make sure the sig environment is safe during operati
- Do not use this product in damp or wet environments;
- Do not immerse this product, power cord, or plug in water or any other d:
- Do not let the power cord touch the heat plate during operation. Do nose the product with any liquid
- Always supervise the product during use to prevent accidents;
- After use, wait until the product is completely cooled down before cheor storing it to avoid burns
13.When unplugging,alwayshold the plug itself-never pull the cord - WARNING To reduce the risk of electric shock and injury to persons, dionnect from power supply before servicing
- If the product or power cord is damaged, stop using it immediately.Donot attempt to disassemble or repair it
yourself. Contact HTVRONT customer service for assistance - Do not place the heat press mat on the device or any surface that isnot heat-resistant immediately after use;
- To reduce the risk of electric shock, this product has a polarized plug (one blade is wider than the other). This plug is
intended to fit in a polarized outlet only one way. When the plug does notly in the outlet, reverse the plug. When it
still does not fit,contact a qualified electrician to install the proper oange the plug in any way: - To reduce risks of fire,electric shock,or injury to persons,the user tthe product and connected cord so that
it is not likely that the product will be overturned; - To reduce risks of fire, electric shock,or injury to persons due to ovhe replacement of a lamp, or deaning the
product. The appliance must be disconnecting the power-supply cord - After to the cleaning of the product, including any necessity for disaissembly (and reassembly);
- Before use the appliance, user must be read the detail of buttons instructions.
¶ HTVRONT A200 Auto Tumbler Heat Press Limited Warranty
This product is covered by a one-year warranty from the date of purchase. If a defect occurs under normal use within the
warranty period we will provide warranty service. Proof of purchase is reqired to daim warranty service. HTVRONT accessories are
covered by a free warranty for three months from the date of purchase. In nt that any warranty terms conflict with appli
cable local laws and regulations, the local laws will take precedence.
To the extent permitted by applicable laws, HTVRONT is not responsible forwarranty in the following situations: malfunc
tions caused by improper use, maintenance, and storage by consumers;malfunctions caused by self-repair or dismanting by
those who do not undertake the three-guarantee repair without the pernission of our company, products that can continue to
be used after repair when the warranty expired, damage caused by forcemajeure Mearwhile, HTVRONT disdaims all implied
and legal warranties, including warranties of merchantability and fitness for a particular purpose. The warranties that are
allowed to be denied are for the duration of this warranty
Proof of purchase may be required to verify warranty eligibillty.