Thank you for choosing HTVRONT!
Ber stuse pleasereall panygmateals carefullensure properan effectivpeation. HTVRoNT is not responsible for any loss resulting from failure to follow the instructions or from misuse due to misunderstanding.
Whi l sW improving our products and servis,and reserve theright o pdate the produc, sftware, ndManual content without prior notice.
For the latest information and updates, please visit our official website: https://www.htvront.com/
¶ Precautions
- Ensure the power supply matches the required voltage: 120V or 220 - 240V;
T prevent elecri shock or therhazars, use this produc only as describe i the manua. Donot use it for unintended purposes; - Children under 14 years old MUST have adult supervision while using the product;
Regularly inspect the power cord for any damage. If the cord is damaged, it must be replaced by the manufacturer or a qualified service technician; - Do not use this product in damp or wet environments;
o prevent accidents, do not immerse the product, power cord, or plug in water. Keep the power cord away from the heating plate during use. Do not clean the product with any liquid; - Always keep an eye on the device while it's in use to avoid accidents;
rwituntil he produc pletel col down befoheckig stor avous; 10. When unplugging, always hold the plug itself—never pull the cord;
I you notice any damage to the device or power cord, stop using it immediately. Do not attempt to disassemble or repair it yourself—please contact our service center for assistance.
¶ Specifications
| Name | HTVRONT H1 Mini Heat Press | Model | HPM02 |
| Input Voltage | 120 V ~60 Hz150 W 220-240 V~50-60 Hz150 W | ||
| Temperature | 100-205°C/210-400°F | ||
| ProductDimensions | 10.1 x 6.0 x 9.8 cm/4.0 x 2.4 x 3.9 inch | PackageDimension | 22.5 x 8.0 x 12.5 cm/8.9 x 3.2 x 4.9 inch |
| Product Weight | 0.4 kg / 0.8 lb | Package Weight | 0.6 kg / 1.3 lb |
¶ Included in the Box
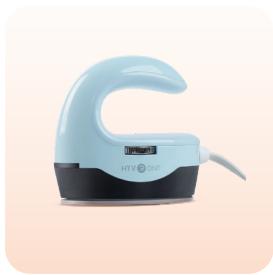
HTVRONT H10 12x10in Heat Press x 1
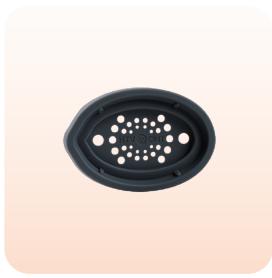
Insulated Safety Base x 1

User Guide Envelope x 1
¶ Device Overview
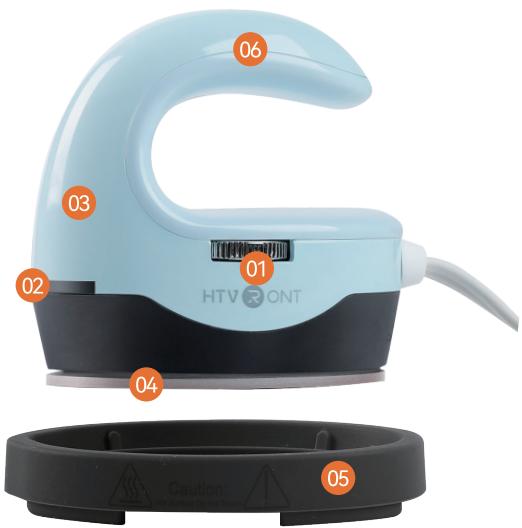
- Switch Knob
- Indicator light
- Insulated Shell
- Heat Plate
- Insulated Safety Base
- Handle
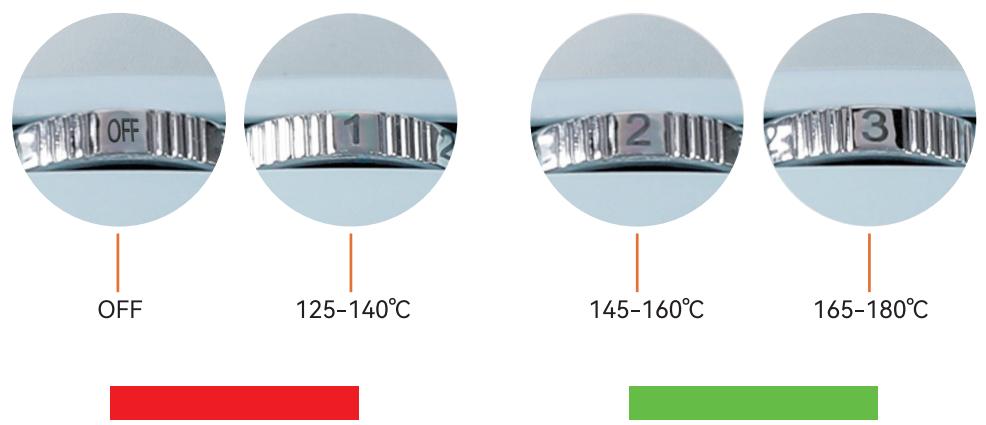
¶ Details of Switch Knob
| Mode | Status |
| OFF | The device is powered off |
| Mode 1 | Temp Reached: 140° / 284°F |
| Mode 2 | Temp Reached: 160° / 320°F |
| Mode 3 | Temp Reached: 180° / 356°F |
¶ Details of Indicator Light
| Color | Status |
| Green | The device is powered on;The device has reached the set temperature. |
| Red | The device is heating. |
¶ Usage Notes
1.Before plugging in the device, ensure the knob is turned to the "OFF" position;
2.Before transferring the design, pre-press the substrates to smooth out any wrinkles;
3.Apply continuous pressure until the design has fully transferred;
4.After use, allow it to cool completely before checking or storing it to avoid burns.
¶ Instructions for Use

Power on the device and the indicator light lights green;
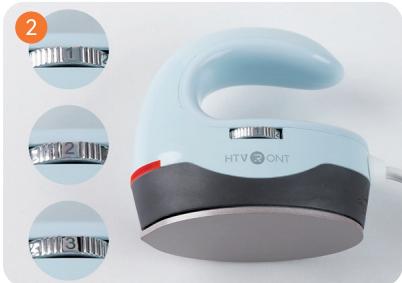
Switch the knob to choose from heat levels 1, 2, or 3, according to the Quick Reference Chart. Once selected, the indicator light turns red and the heat plate starts preheating;
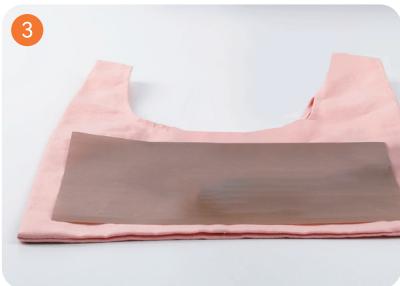
While preheating, secure the prepared design onto the substrate using heat-resistant tape (Not included), then cover the design with a Teflon sheet (Not included);
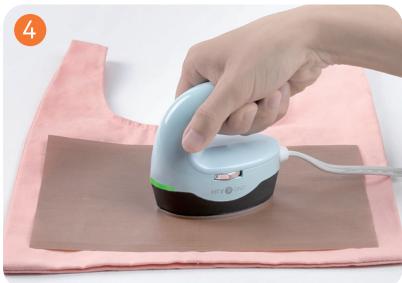
Once reaches the set temperature, the indicator light lights green,start ironing.
¶ Quick Reference Chart
| Material Type | Suitable Fabrics | Temp | Time | Peel |
| Pure Heat Transfer Vinyl | 100% cotton, ≤30% cotton,polyester, modal, canvas | Level 2 | 15 s | Cold Peel |
| Glitter Heat Transfer Vinyl | 100% cotton, ≤30% cotton,polyester, modal, canvas | Level 2 | 15 s | Cold Peel |
| Holographic Heat Transfer Vinyl | 100% cotton, ≤30% cotton,polyester, modal, canvas | Level 2 | 15 s | Cold Peel |
| Chameleon Heat Transfer Vinyl | 100% cotton, ≤30% cotton,polyester, modal, canvas | Level 2 | 15 s | Cold Peel |
| Soft Metallic Heat Transfer Vinyl | 100% cotton, ≤30% cotton,polyester, modal, canvas | Level 2 | 10 s | Cold Peel |
| Glow in the Dark Heat Transfer Vinyl | 100% cotton, ≤30% cotton,polyester, modal, canvas | Level 2 | 15 s | Cold Peel |
| Reflective Heat Transfer Vinyl | 100% cotton, ≤30% cotton,polyester, modal, canvas | Level 2 | 15 s | Cold Peel |
| Flock Heat Transfer Vinyl | 100% cotton, ≤30% cotton,polyester, modal, canvas | Level 2 | 15 s | Cold Peel |
| Puff Heat Transfer Vinyl | 100% cotton, ≤30% cotton,polyester, modal, canvas | Level 2 | 15 s | Hot Peel |
| Pattern Heat Transfer Vinyl | 100% cotton, ≤30% cotton,polyester, modal, canvas | Level 2 | 15 s | Cold Peel |
| DTF Transfer Film | 100% cotton, ≤30% cotton,polyester, modal, canvas | Level 2 | 15 s | Cold Peel |
| Heat Transfer Paper for Dark Fabric | 100% cotton, ≤30% cotton,polyester, modal, canvas | Level 2 | 20 s | Cold Peel |
| Heat Transfer Paper for Light Fabric | 100% cotton, ≤30% cotton,polyester, modal, canvas | Level 2 | 20 s | Cold Peel |
| Sublimation Paper | 100% cotton, ≤30% cotton,polyester, modal, canvas | Level 3 | 40 s | Hot Peel |
¶ FAQS
Q1: Why does the device emit a bit of smoke during heat pressing?
A1: It is normal when using the sublimation substrates as the sublimation ink will vaporize into gas.
Q2: How to achieve the best heat transfer results?
A1: Set the temperature as recommended in the Quick ReferenceChart;
A2: For best results, use HTVRONT supplies and follow our reconmended parameters
Q3: How to iron if my design is larger than the heat plate?
A1: If pressing one section at a time without shifting the press, try to avoid re-pressing the same area;
A2: If moving the press across multiple areas, ensure that the pressing tiach section matches the
recommended time in the Quick Reference chart
Q4: Why is the indicator light flashing during use? Is the device malfunctpg?
A1: It is normal that the indicator light will keep flashing when the deviis running.
Q5: What to do if the device stops working?
A1: Ensure the device is powered on:
A2: Unplug the power and restart the device again;
A3: If the above steps don't work, please contact HTVRONT customer service
Q6:Whycan'tthedevicebefullyturnedoff?
A1: It is normal as the indicator light will remain on as long as the devite is powered on. If you want to turn
it off,just unplug the device.
¶ Device Maintenance
- Before or after use, ensure the product has completely cooleddown to avoid burns or short circuits;
- Always unplug and let the device cool before cleaning. Use a soft,dry cloth to wipe the surface. Do not
rinse with water; - Keep the working environment well-ventilated and dry. Avoid direct surnlight;
- After cleaning, store the product in a dry,dust-free environment
- Regularly inspect the plug and power cord for aging or damage to prevent short circuits;
- Do not disassemble the heating components or modify the electrical circuit under any circumstances.